How to migrate a site to Staq
Easily migrate your website to Staq. Simply install the Staq migration plugin, follow the prompts, and in no time, your migrated site will appear as a staging/development site on Staq ready for you to review and take live.
Preparation
Download Plugin
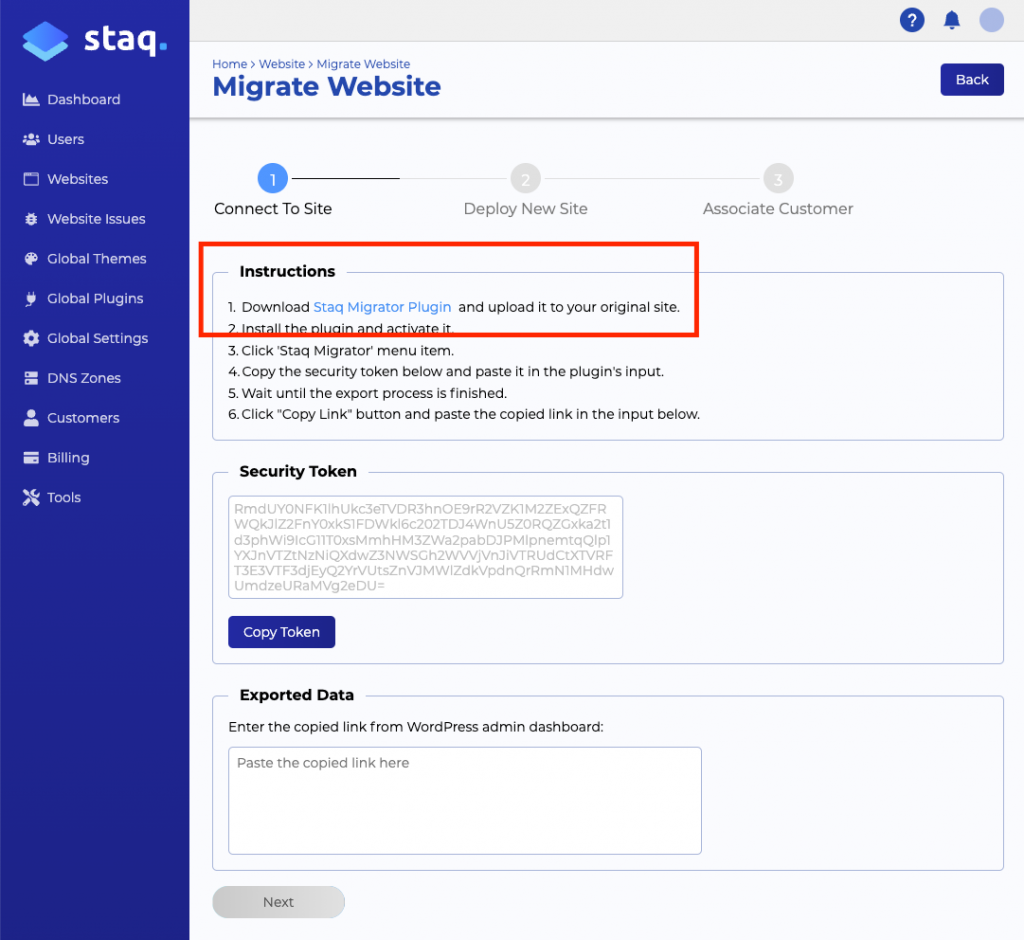
In your Staq account, go to Websites > Create Site > Migrate.
Download the Staq Migrator Plugin as per the screenshot below:
Install Plugin
Log into the website that you wish to migrate.
Click Plugins > Upload Plugin
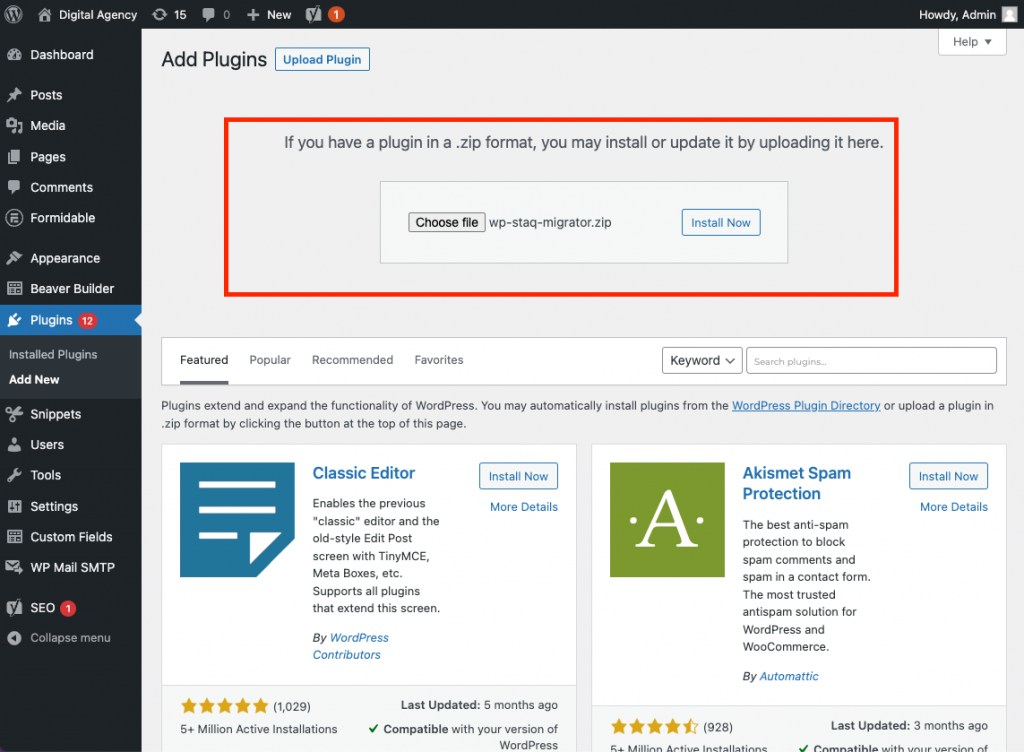
If that fails because the website does not allow you to upload a plugin, search for File Manager as a plugin and click Install Now. If that works, activate the plugin and upload the Staq Migrator zip file to the wp-content/plugins directory.
Then, extract the zip file by right-clicking the file.
Go back to Plugins and activate the WP Staq Migrator plugin.
Disable Security Plugins
Inside the Plugins page, disable all security plugins that may interfere with the backup and transfer phase to Staq. Popular plugins include, but are not limited, to:
- Wordfence
- Jetpack
- All In One WP Security & Firewall
- Security & Malware scan by CleanTalk
- iThemes Security
Once this process is completed, it’s time to transfer.
Commence Migration
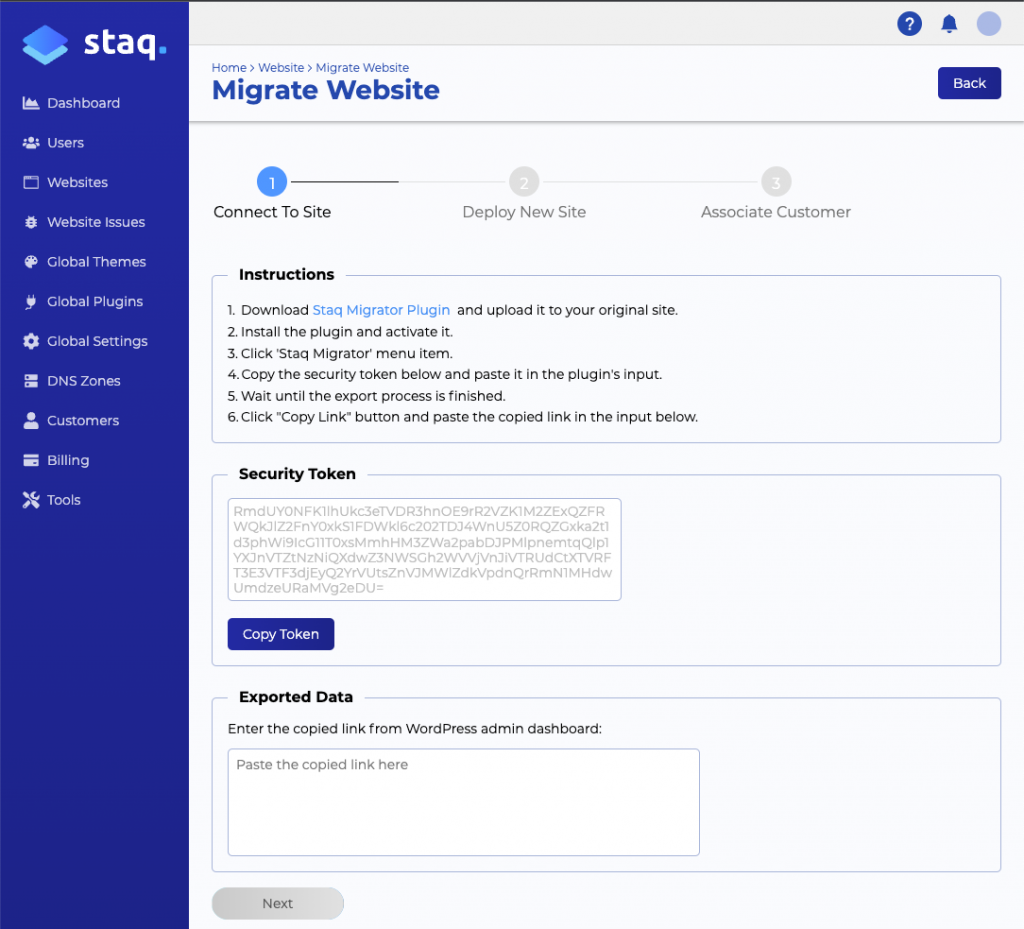
Go back to the Migrate Website page on Staq (the same page where you downloaded the migration plugin) and under Security Token, copy the token code:
Then, back on the WordPress website click Staq Migrator on the left-hand side paste the token code and click Validate Token:
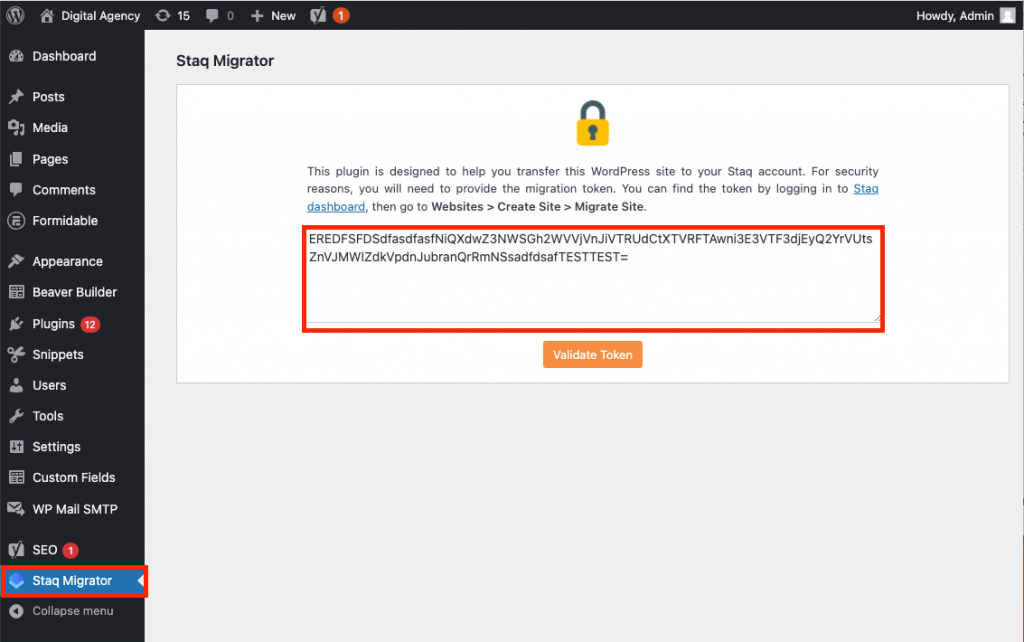
Once the token has been validated, a new box will show where you can enter an email address. This will alert you once the backup has been completed. Click Export to commence:
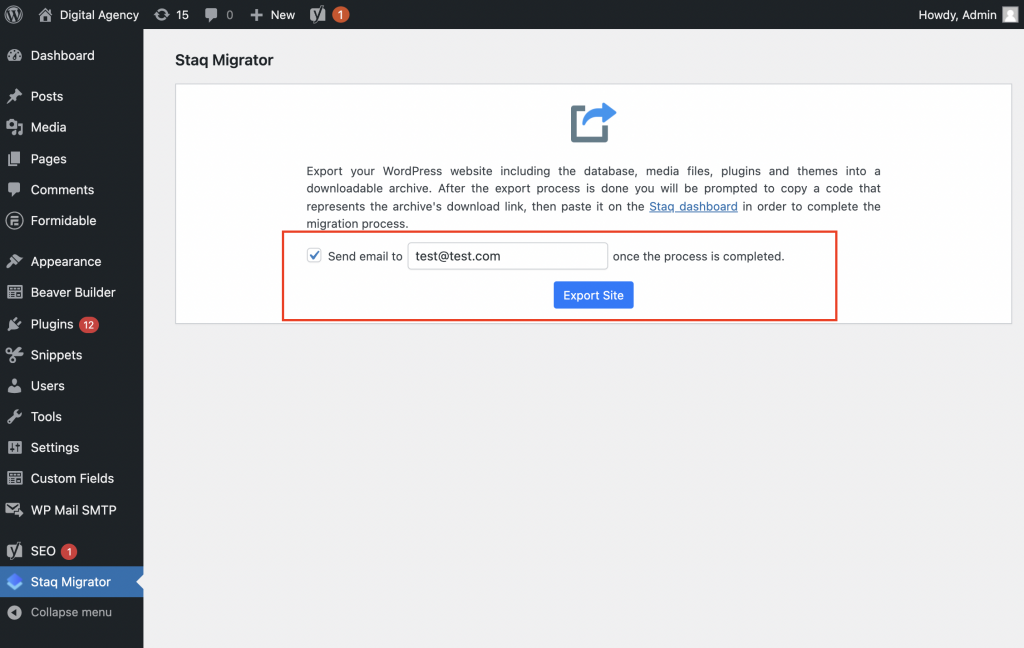
The process should look like this:
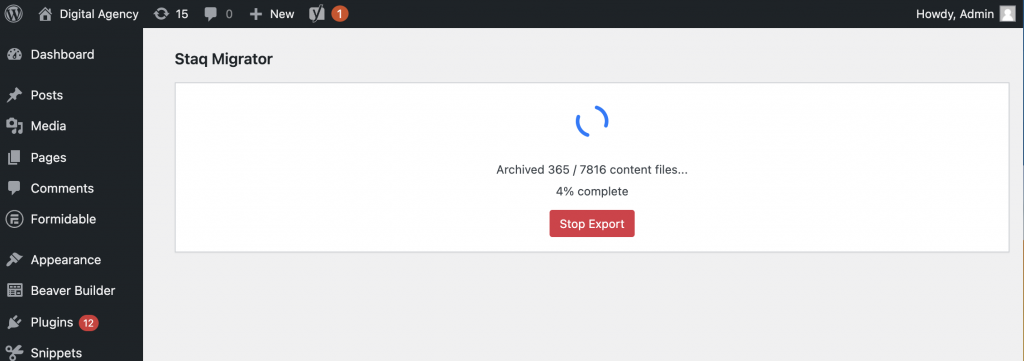
Once the process has been completed, there are 2 ways to retrieve the output code. Either, go back to the WordPress website and click Copy Code. You’ll paste the code inside the Staq interface.

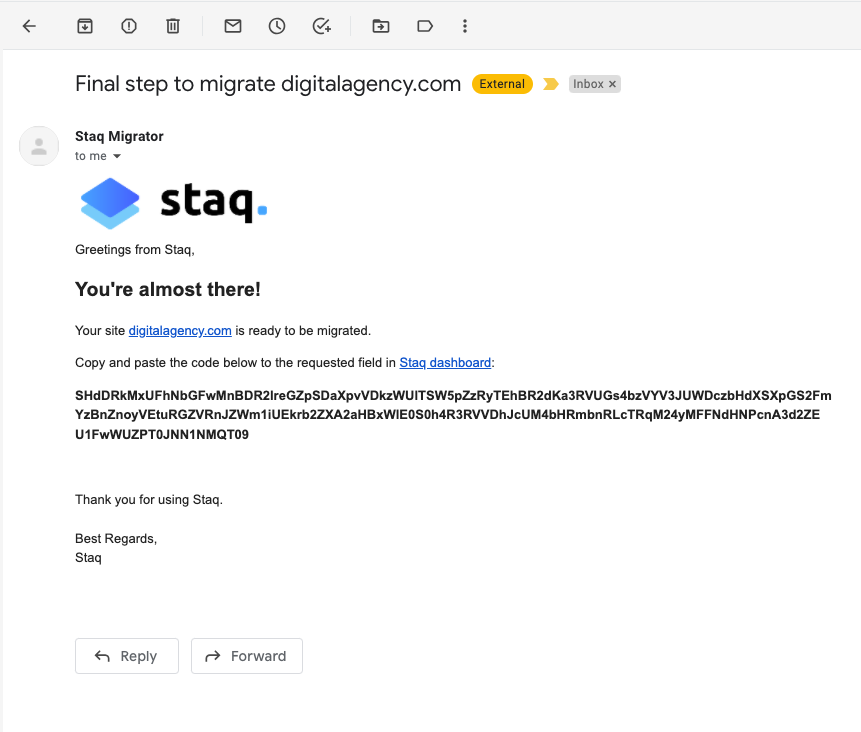
Or, if you’ve elected to receive an email once the backup has been completed, you should receive an email something like this. Copy the code and go back to the Staq interface:
In the same screen as where you originally had to get the Token code, copy the code from either the WordPress website or the email and paste it under the Exported Data section as per the screenshot below:
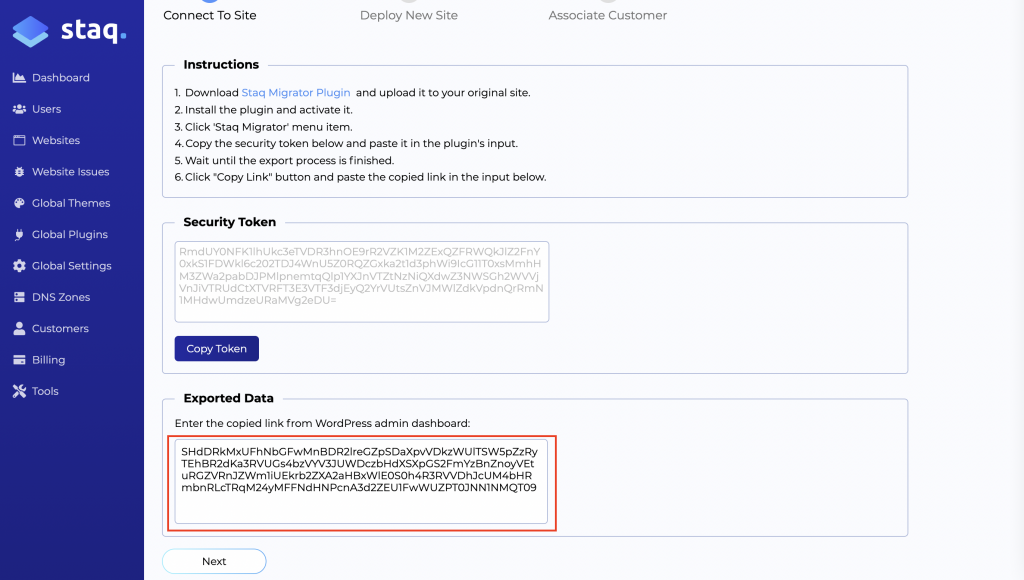
Click Next. Follow the prompts in the next section below.
Setup
Commence Migration
After completing all the steps above, it’s now time to set an internal ID name of the website inside your Staq account. We recommend that you put the business name as the Staq ID name:
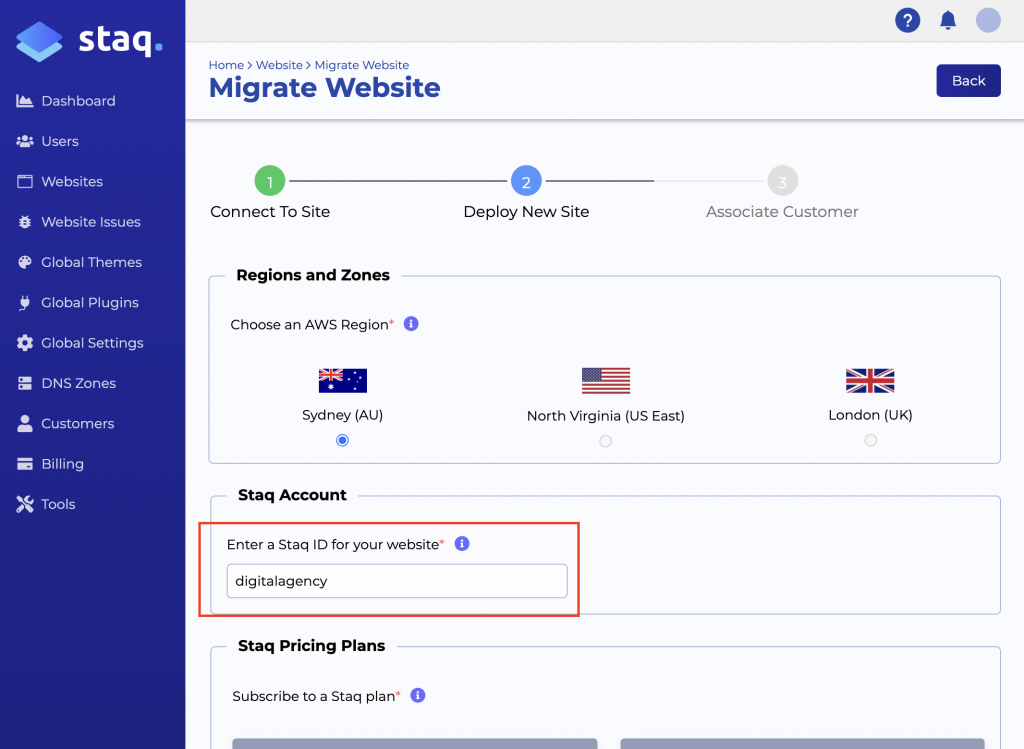
OPTIONAL: if you manage multiple websites i.e. a developer or agency, below, you’ll see the agency plans that you’ve set up (if you’ve already done this). You’ll then assign a plan to them.
Otherwise, this section will be blank if it hasn’t been set up.
Click Next.
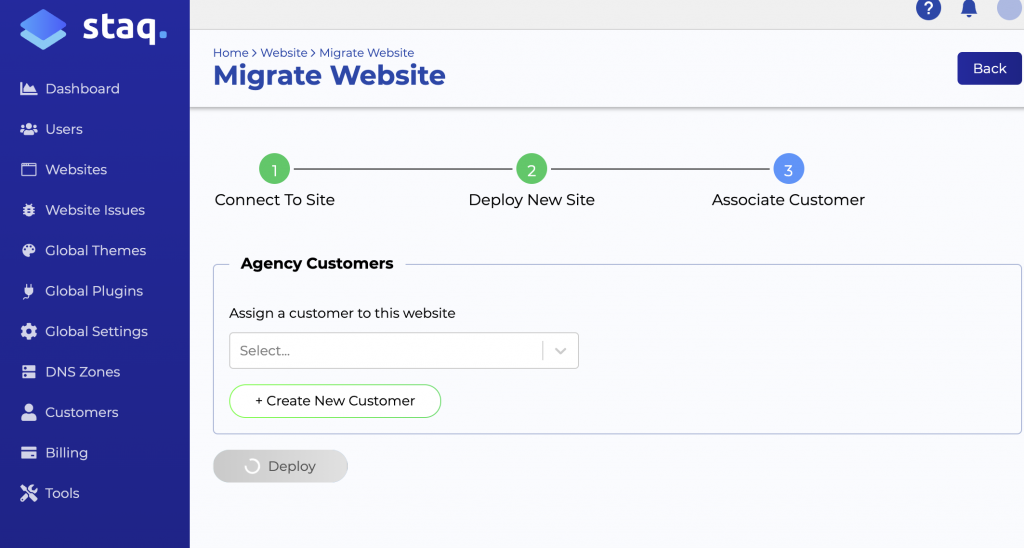
OPTIONAL: You can create a customer which will then assign the website plan in the previous screen to a customer.
Otherwise, click Deploy:
After a moment, the page should redirect to the website table. From there, you can search for your ID name to see the status of it by hovering over the State column:
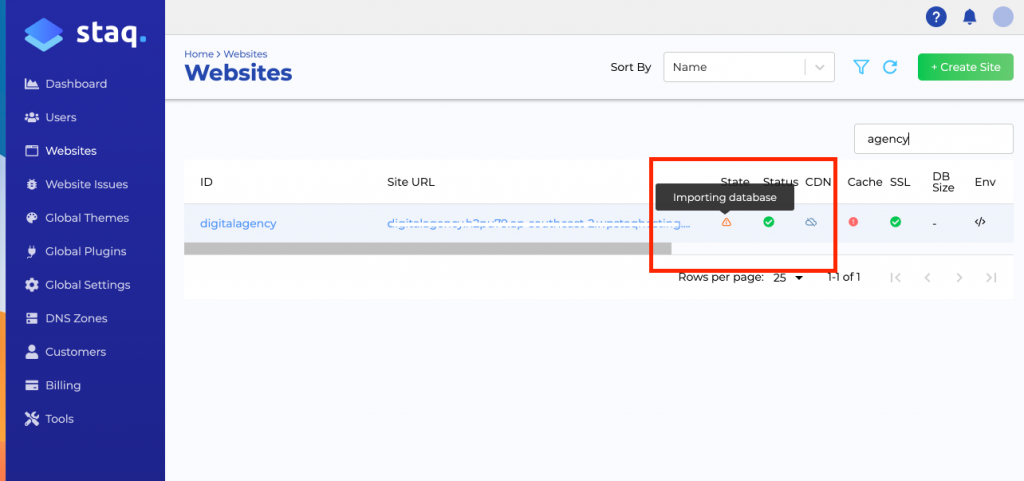
Once it is done, the Status should say Available.
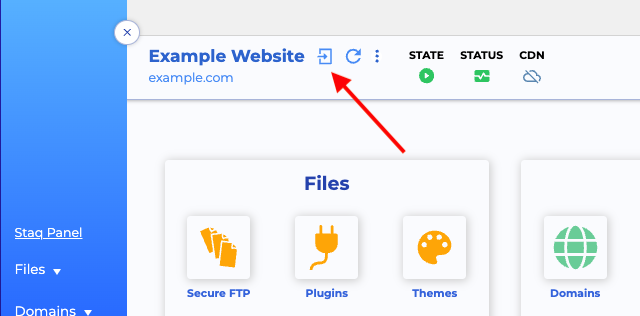
You can click the 1-click login built inside Staq to access the backend of the site:
Testing post-migration
Once the migration has been completed, please ensure that you’ve tested your website to ensure that everything works correctly before taking the website live.
Optimization
Enable Staq Cache
To ensure your website loads as fast as possible, disable all performance and optimization-based plugins such as WP Rocket, Fastest Cache, and Autoptimize from the Plugins section of WordPress inside your recently migrated website.
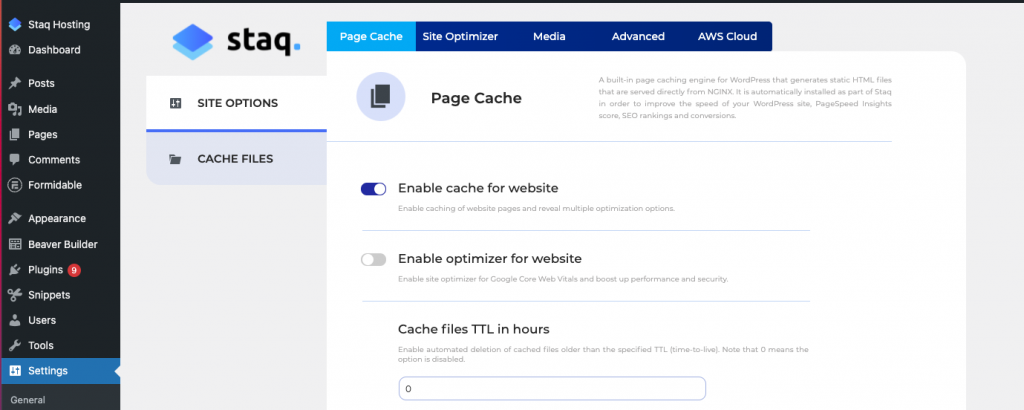
Then, on the left side, you should see Staq Hosting. Click on that and Enable cache for website:
Core Web Vitals Optimisation
To get the most of your website, including, improving your Google Core Web Vitals score, you can follow the Staq guide on how to improve your Google Core Web Vitals score.
Taking website live
Go Live
Once you’re ready to take the website live and wish to use Staq DNS, go to Staq Panel and click DNS Zone under Domains. Once DNS is set up, you’re ready to take the website live.
Under Staq Panel, click GO LIVE under Domains. From there, follow the stepper prompts and you’ll have the website live within a minute or two.
FAQ’s
How can I manage many concurrent migrations at any given time?
The Export Token isn’t unique for each website but rather it’s linked and unique to your account. That means you can migrate many sites simultaneously. This is how you can migrate simultaneously:
- If you have say 5 migrations to do, open 5x tabs of this page: https://app.wpstaq.com/website/migrate
- The Export Token is not unique to each website so you can use the same Token on all 5 sites when you install the Staq Migrator plugin.
- Once the migration has completed, copy the code to the Import Token. Please note that the Import Token is unique so please be careful to apply the correct Import Token to the correct app name to correspond to the correct website.
- Each migration that you do, it will automatically redirect to the Staq Panel of that site and you can track the progress.
Is the Staq Migrator a one-way migration plugin?
Yes, it’s only to migrate a website into Staq and not the other way.
When I migrate a site, does it go into a development environment by default?
Yes, a migrated site goes into development environment or dev mode by default. It’s protected by no-follow for SEO and search engine purposes. It’s also free up to 90 days and you only pay once you take it live or once 90 days is over; whatever comes first! If you wish, you can also create a staging environment as a separate environment.
Need some help?
We all do sometimes. Please reach out to our support team by dropping us a support ticket. We will respond fast.


