How to setup Bitbucket with Staq
Introduction
For the developers out there that love git control, we now support Bitbucket integration on Staq.
Global / Website managed plugins/theme
Global managed plugin/theme
You can manage your Bitbucket repository as a WordPress plugin inside the Staq Global Plugins section which means you can pull your changes directly into your Global Plugin in Staq and it’ll automatically update across every single site that has this Global Plugin activated on each site.
To access this function, go to Global Plugins or Global Themes > Connect via Git:
Website managed plugin
You can apply a Bitbucket repository as a WordPress plugin inside an individual website.
To access this function, go to the website in question and then Plugins > Connect via Git:
Instructions
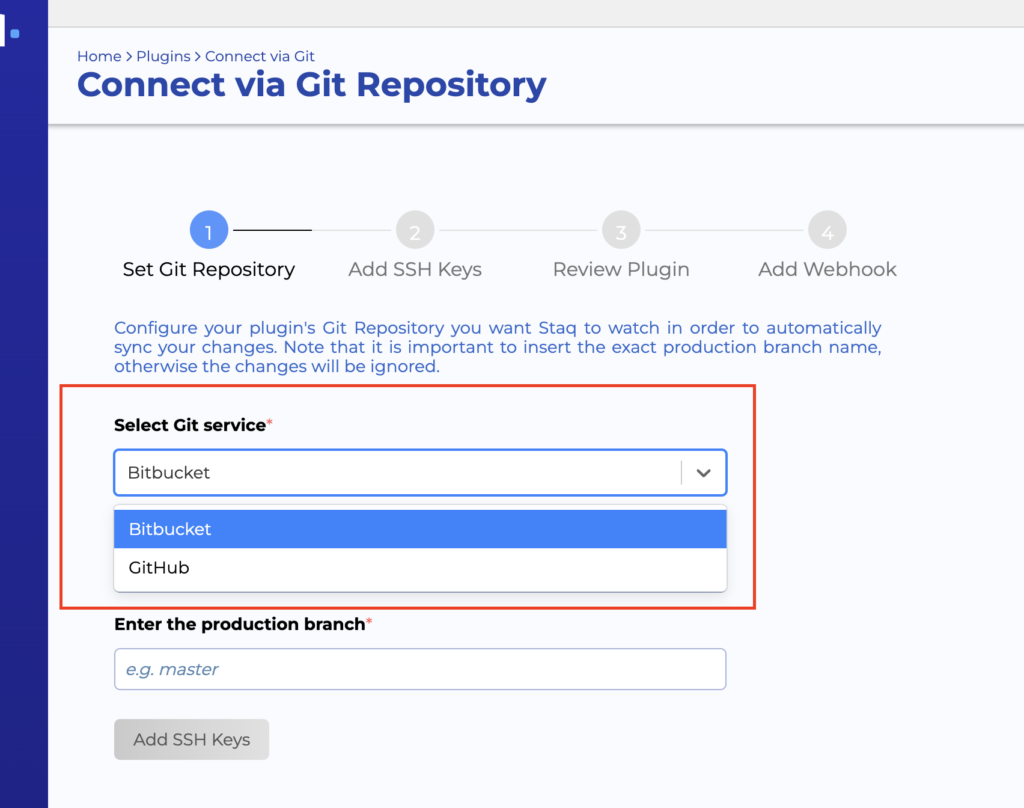
Select Bitbucket:
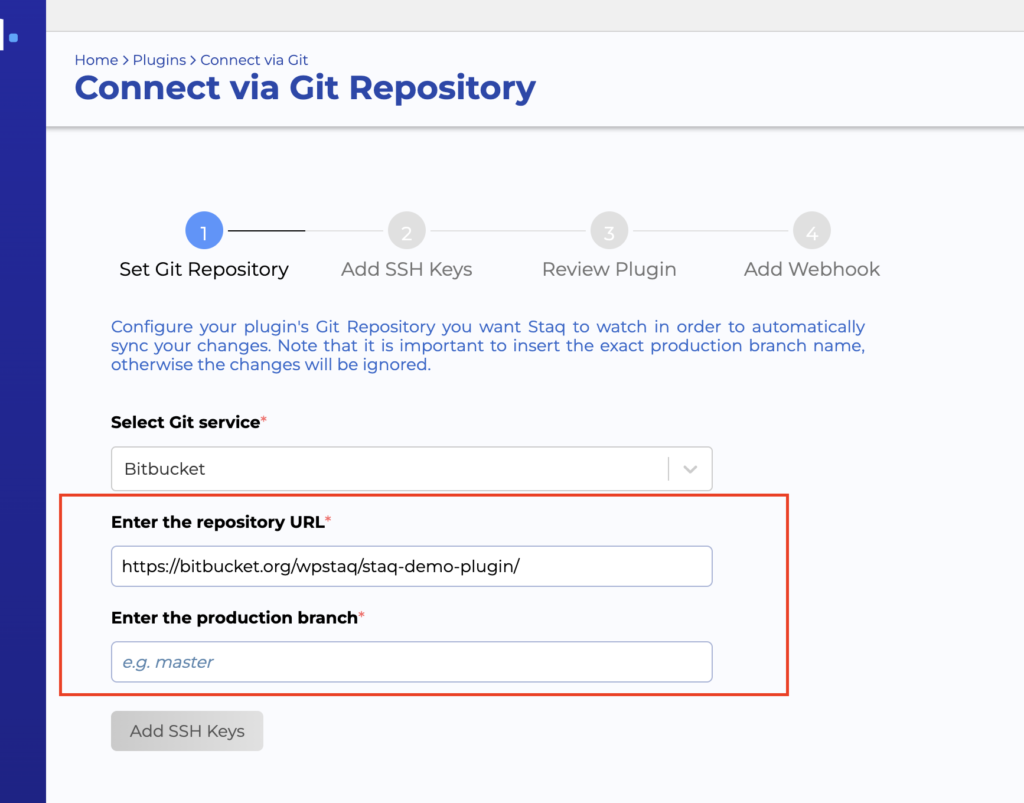
Then, enter your repository URL and then the production branch i.e. master
Click Add SSH Keys
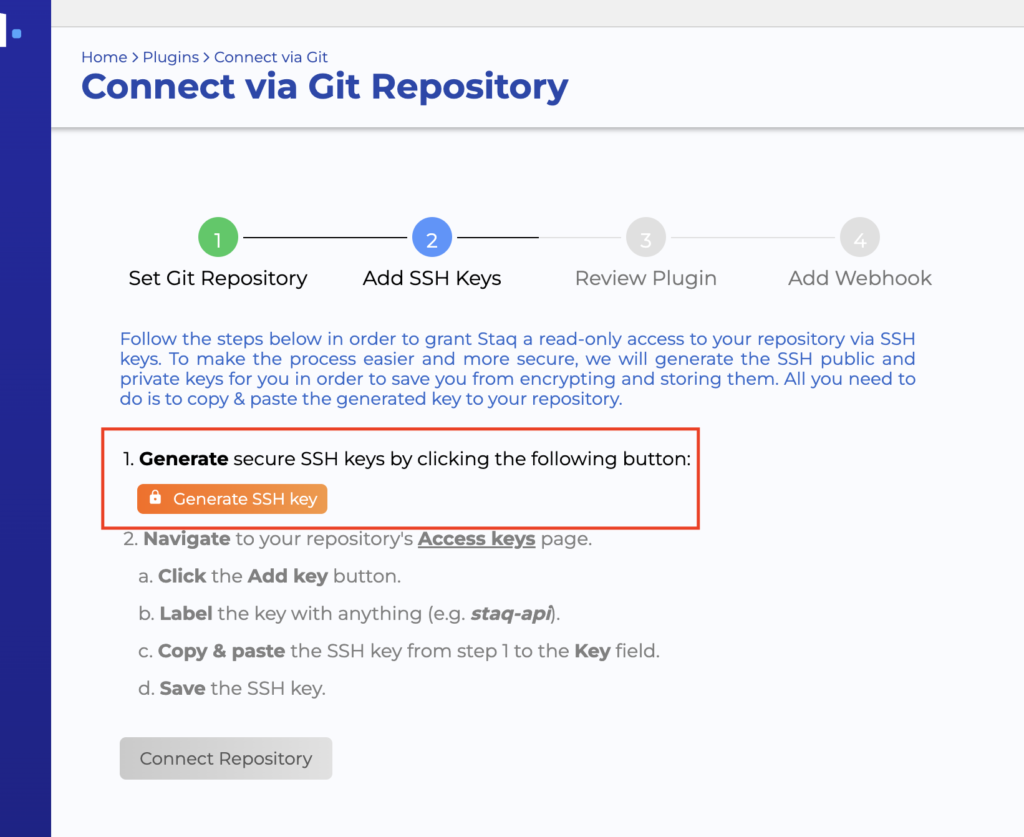
In the next screen, click Generate SSH key:
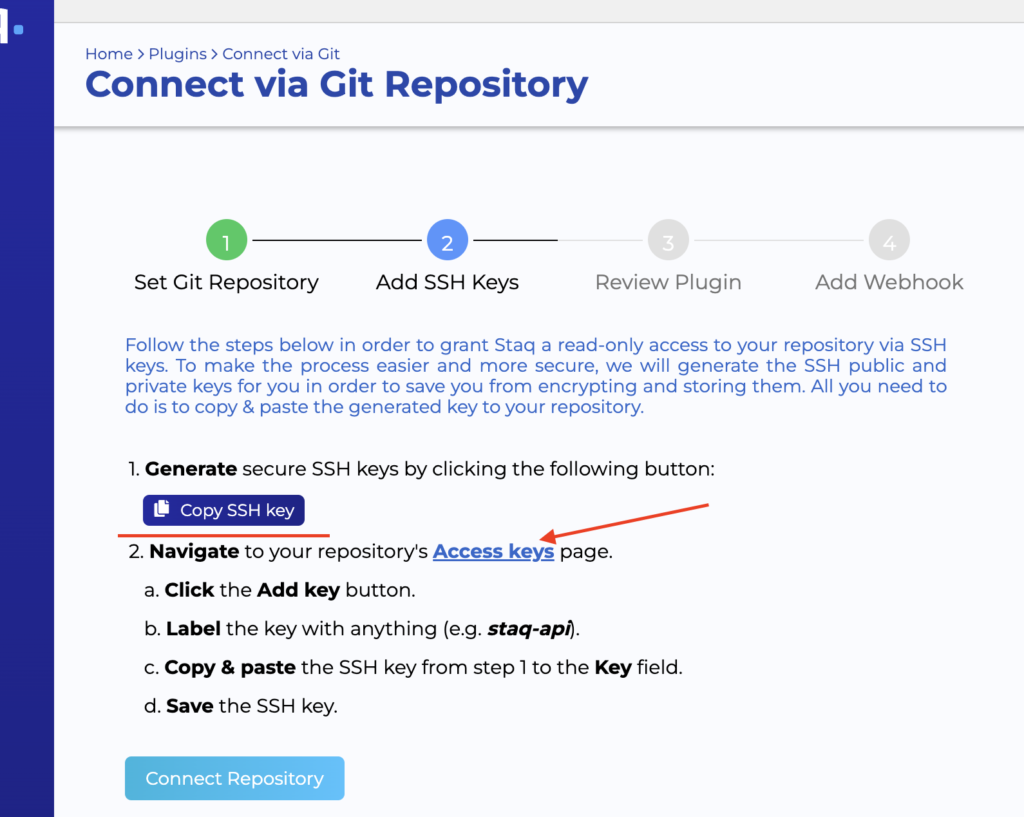
Then, click Copy SSH key and then click link, Access keys:
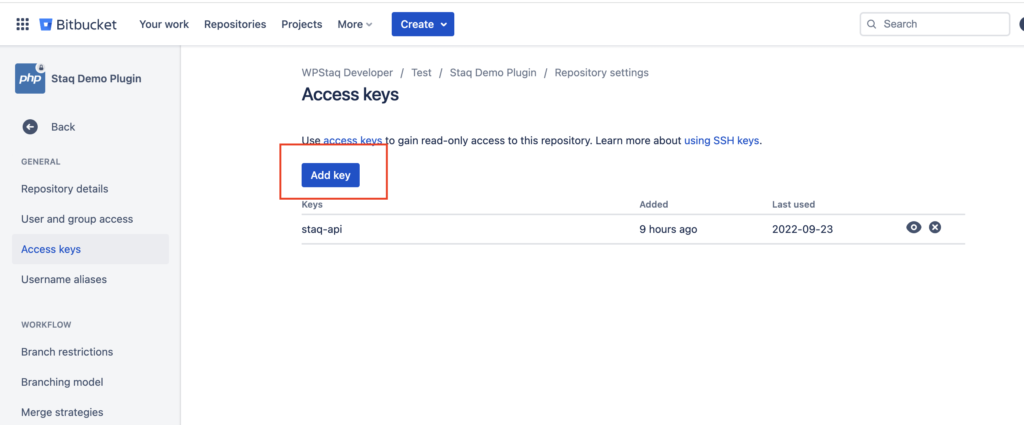
Click Add key:
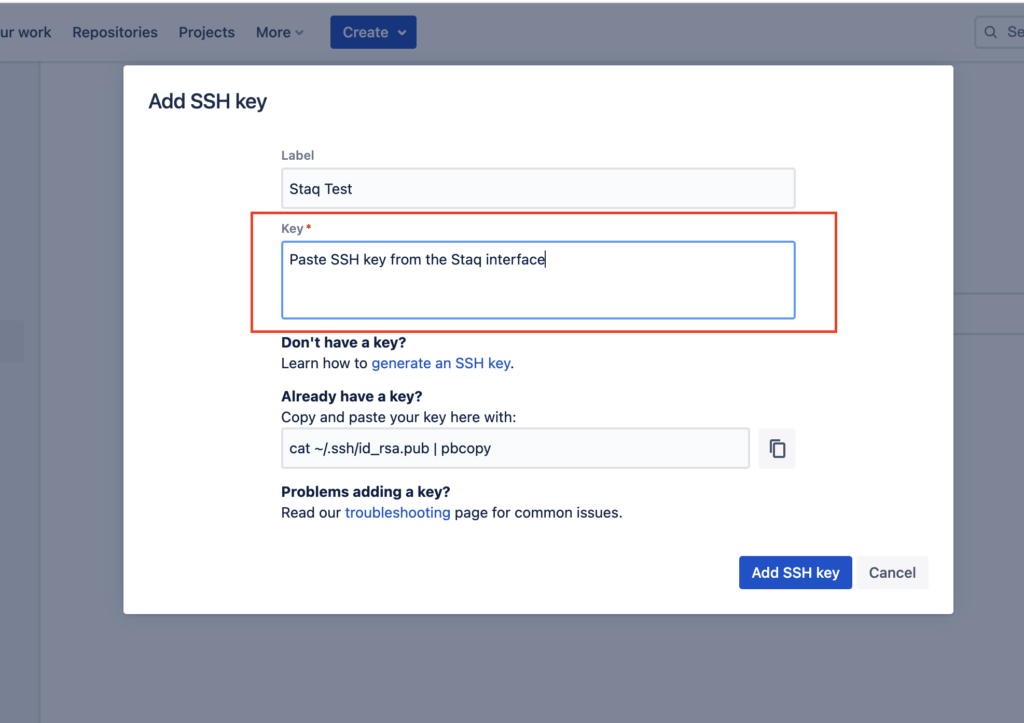
Insert the Label and the paste the Key:
Click Add SSH Key:
Go back to the Staq page and click Connect Repository:
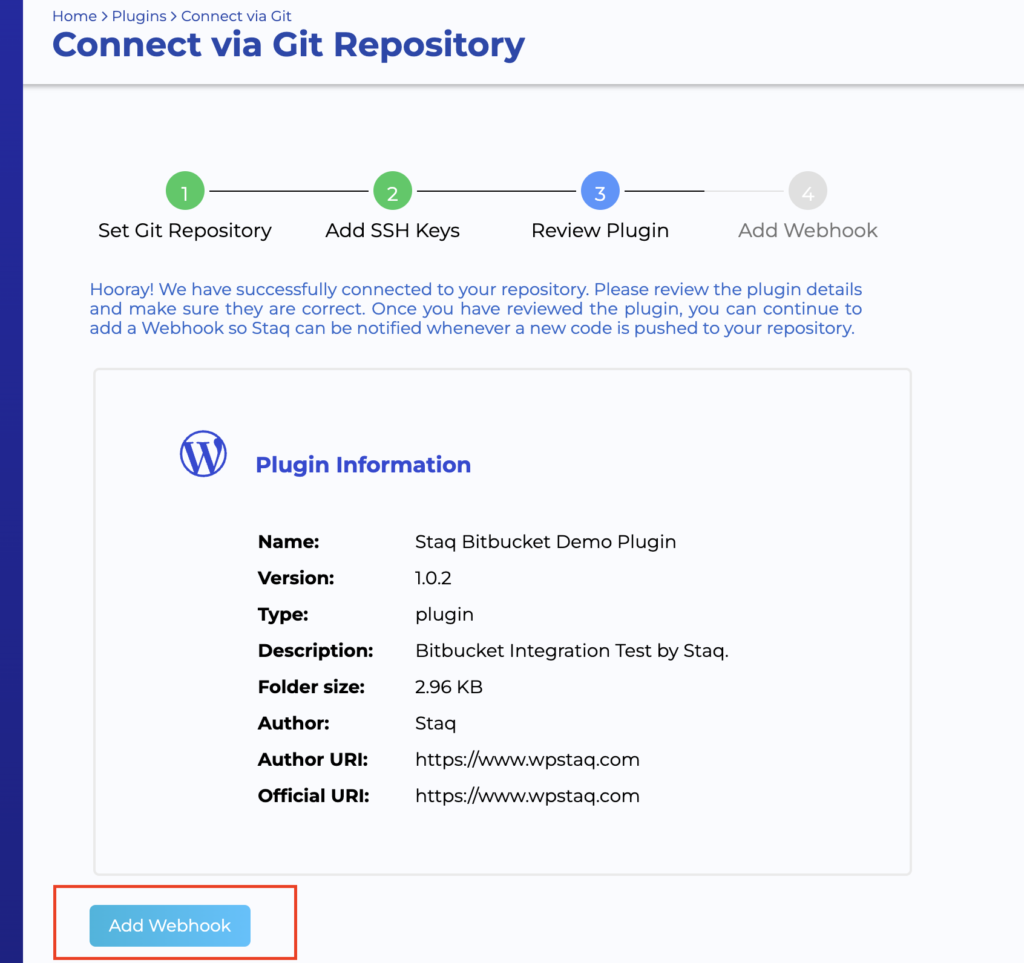
You should be directed to a different screen and then click Add Webhook:
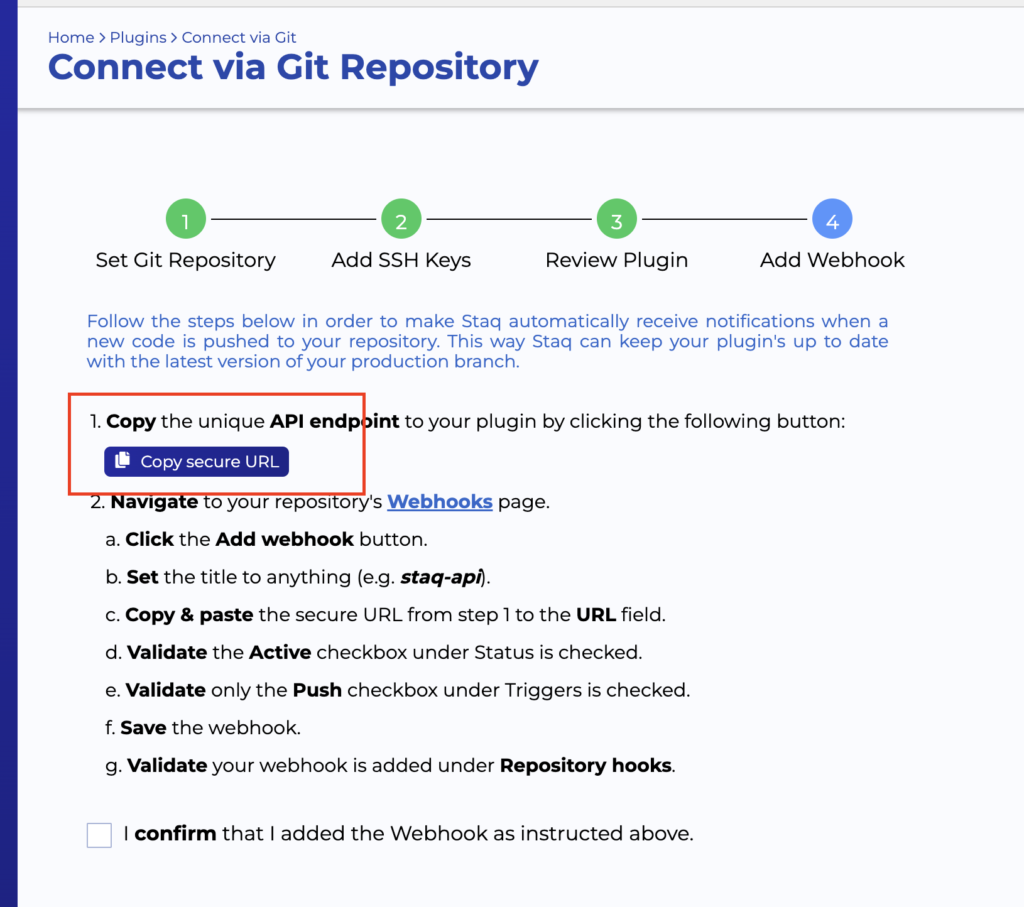
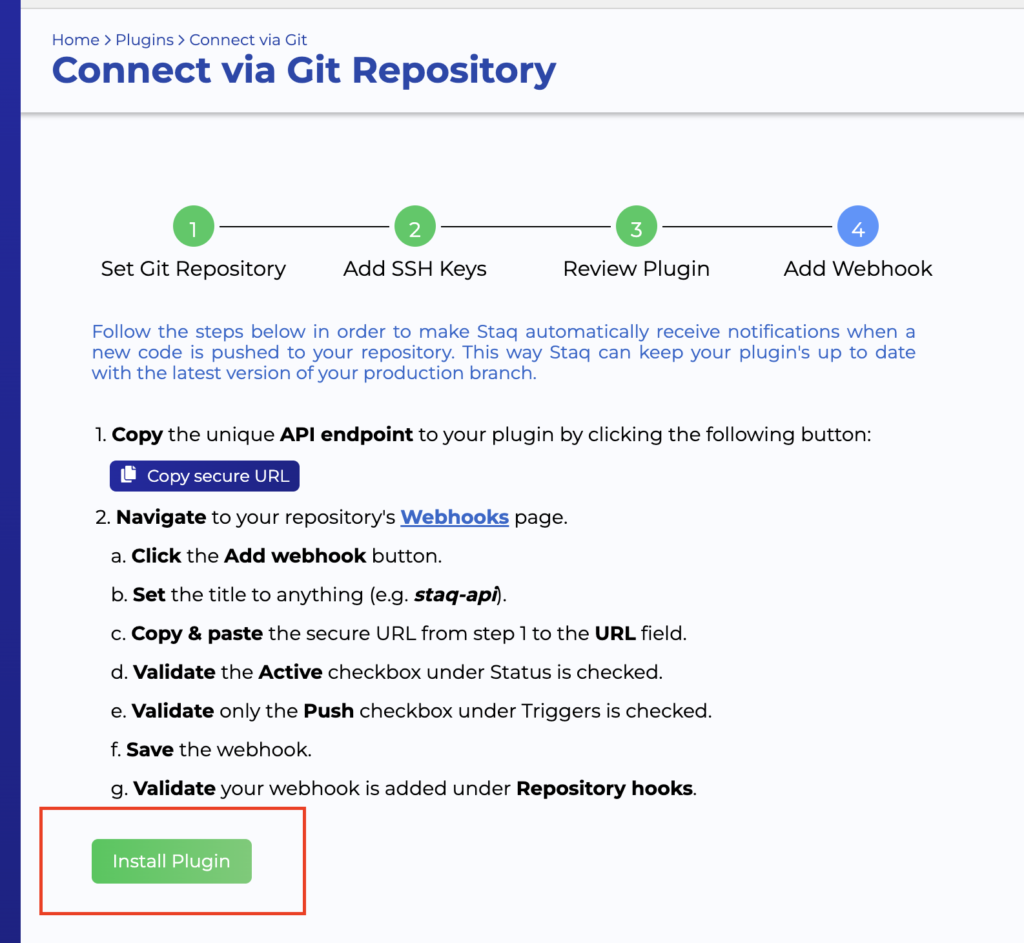
In the last step, click Copy secure URL and then click Webhooks:
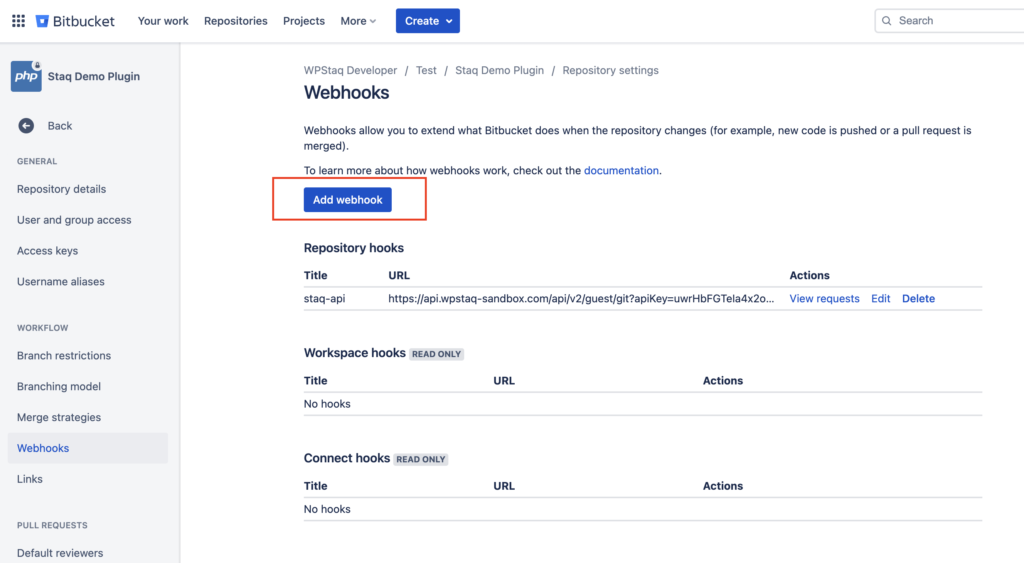
In Bitbucket, click Add webhook:
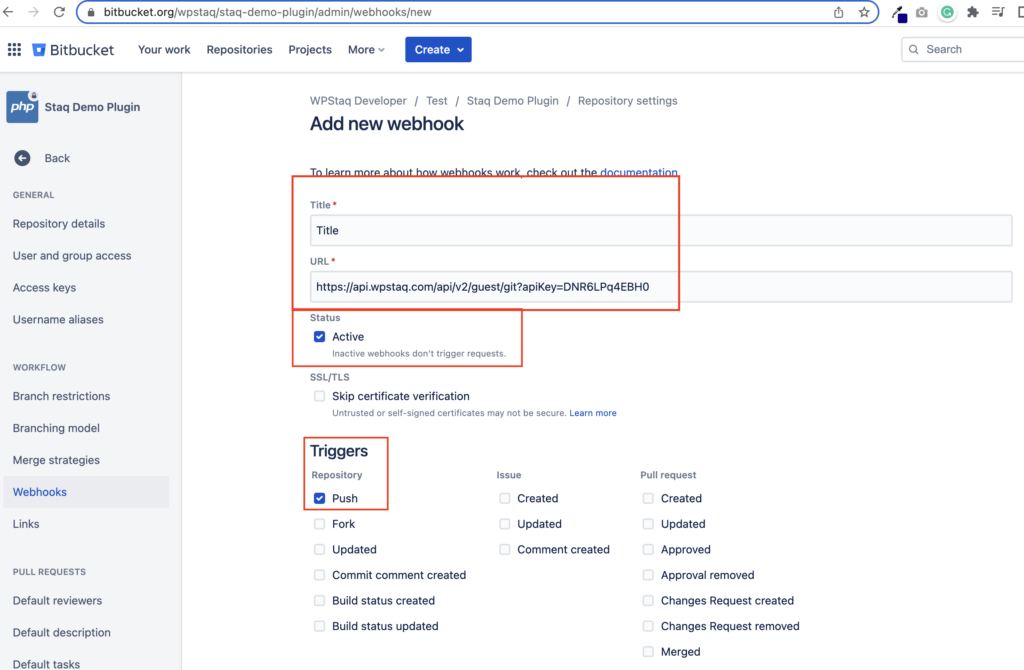
Enter a random Title and paste the URL (this is the secure URL link inside Staq).
By default, Active and Push should be enabled.
Click Save:
Go back to Staq and click the checkbox:
Click Install Plugin:
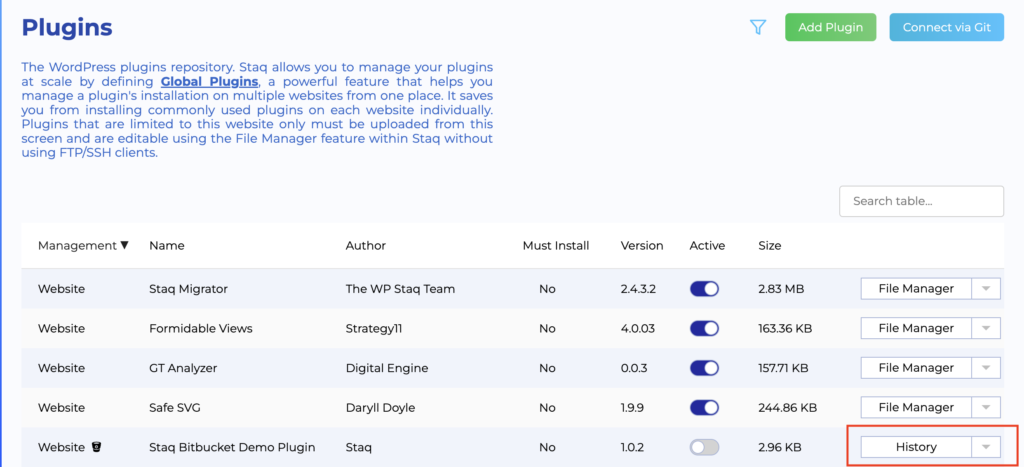
Inside the Plugins page of Staq, you should see a bucket icon that symbolizes Bitbucket connection:
If you click History, it will reveal the related events to your plugin / theme such as code pushes and system health checks realized by Staq to ensure the validity of the integration:
Need some help?
We all do sometimes. Please reach out to our support team by dropping us a support ticket. We will respond fast.


