Configure Staq Cache
Configuring the cache is super simple on Staq.
Enable Cache
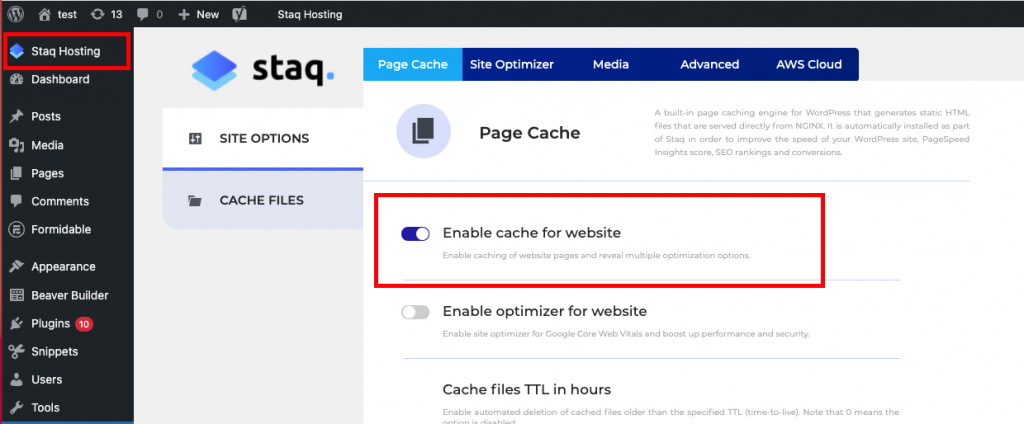
Log in to the WordPress website in question. Then, under Staq Hosting > enable the toggle, Enable cache for website:
By default, the caching environment will automatically dump the entire cache when:
- page builders such as Elementor or Beaver Builder regenerates their libraries which will cause our caching system to dump the cache
- our caching tool detects that you’ve made global changes
- you manually clear the cache.
Our caching environment will automatically delete the cache for a page/post that you’ve updated rather than dumping the entire cache.
Automatically clearing cache for a particular page
Rather than dumping the entire cache for the benefit of updating one page only, we’ve created a function that will do exactly that.
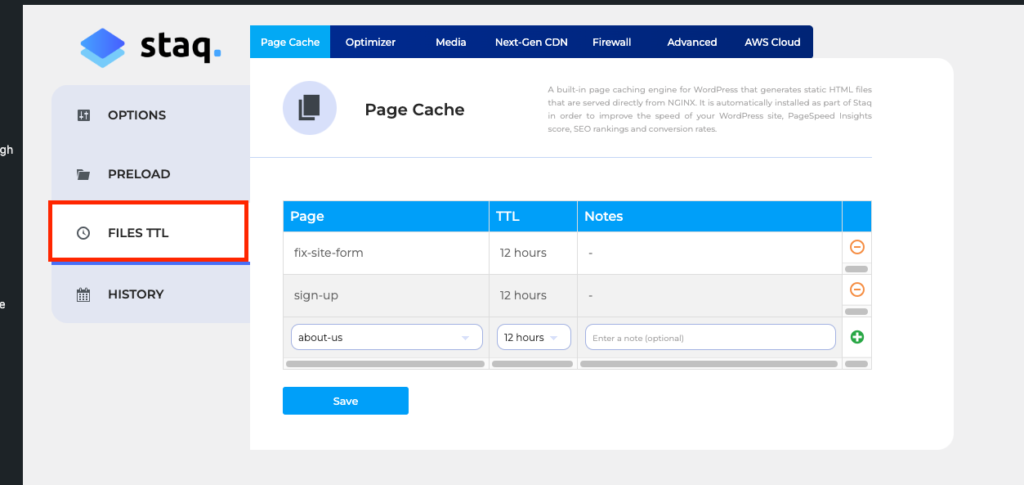
Inside Page Cache > Files TTL, you can select the WordPress slug page and the TTL time range and it’ll automatically dump the cache for that particular file based on the TTL you select.
Enable/Disable Automatic Cache Clearing
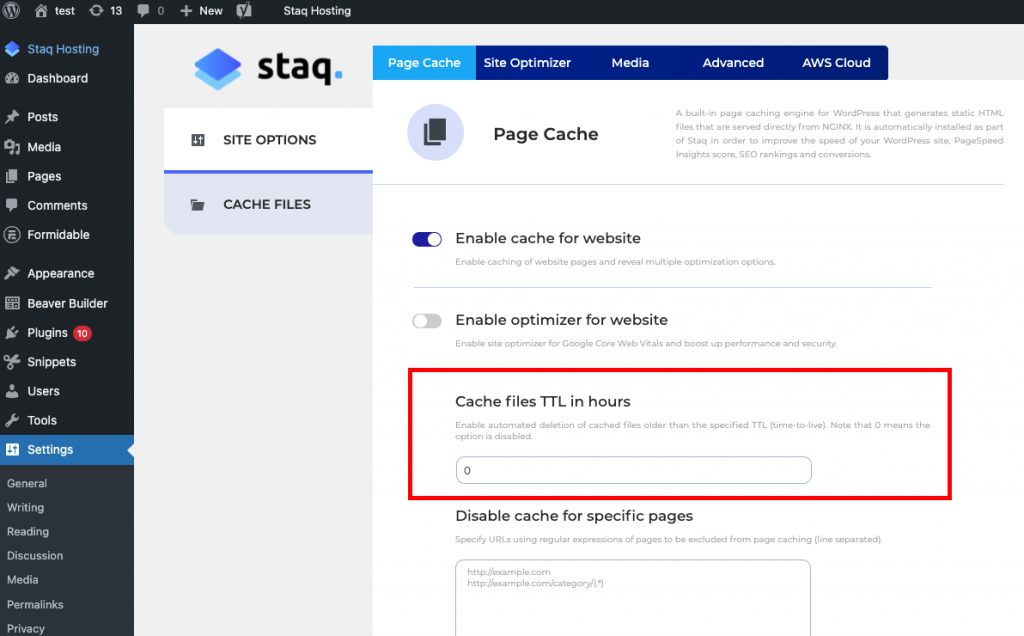
To configure when you wish for the cache to automatically clear, you can set the timer under Cache files TTL in hours:
How to dump cache on archive pages when updating a blog post and etc
The Staq caching solution will dump the page cache when you update it, however, out of the box, it will not dump the archive page. A particular scenario is you create a new blog post but the main cached blog page does not show the new blog post.
By following this knowledge base, you can configure Staq Cache on how to automatically delete the archived cache page when you create a new page
Preload Cache
Under Page Cache, at the bottom of either Site Options or Cache Files, you can click Preload Pages which will run the process of generating all caching files for each page.
Need some help?
We all do sometimes. Please reach out to our support team by dropping us a support ticket. We will respond fast.


